Windows VM with GPU Passthrough, Part 1: Creating a basic Windows VM
Last time, we introduced a series on running a Windows VM with native-level graphics performance via GPU passthrough and integrating it seamlessly into your Linux desktop via Looking Glass. We start this journey by creating a basic Windows virtual machine, which will form the foundation of all future work.
For this example, I decided to use Windows 11 for fun, since I did it quite a few times with Windows 10 already. However, given that Windows 11 is basically a renamed Windows 10 with some additional hardware requirements, there is not much of a difference anyway.
On the Linux side, we will be using the standard QEMU/KVM setup, managing our
virtual machines with libvirt. Let’s begin!
Preparation
No good journey can start without sufficient preparation. To start, you need to
enable hardware-assisted virtualization in the UEFI firmware (commonly still
called “BIOS”) if you haven’t already done so. This is buried in the settings
under names like SVM, Intel VT-x, AMD-V, or just “virtualization”.
Unfortunately, this is highly specific to your motherboard and I cannot provide
more help. Once done, grep -oE 'vmx|svm' /proc/cpuinfo | sort -u should
produce output.
On the Linux side, you want to install the following packages (the names depend on the distribution, but I’ll use Debian as an example):
-
libvirt: a virtual machine management daemon -
virt-manager: a GUI forlibvirt -
qemu-system-x86: an emulator capable of using KVM -
ovmf: a UEFI firmware implementation -
swtpm: a software TPM emulator (Windows 11 only)
Once you have these packages, you’ll also need a Windows ISO. You can download this from Microsoft:
For optimal VM performance, you’ll want to use virtio devices. These are
designed for virtual machine use and have far less overhead than emulating real
hardware. The Linux kernel usually contains drivers for these devices, but the
same is not true for Windows. To have a good time, you should download this ISO
file as well.
You’ll also need a chunk of free disk space to store your virtual machine. Given the disk requirements of Windows, I would suggest at least 40 GB.
Creating the Virtual Machine
We start by launching virt-manager, and then →
. You want a QEMU/KVM connection. If none
exist, you should go back and add a connection to QEMU/KVM on the local machine.
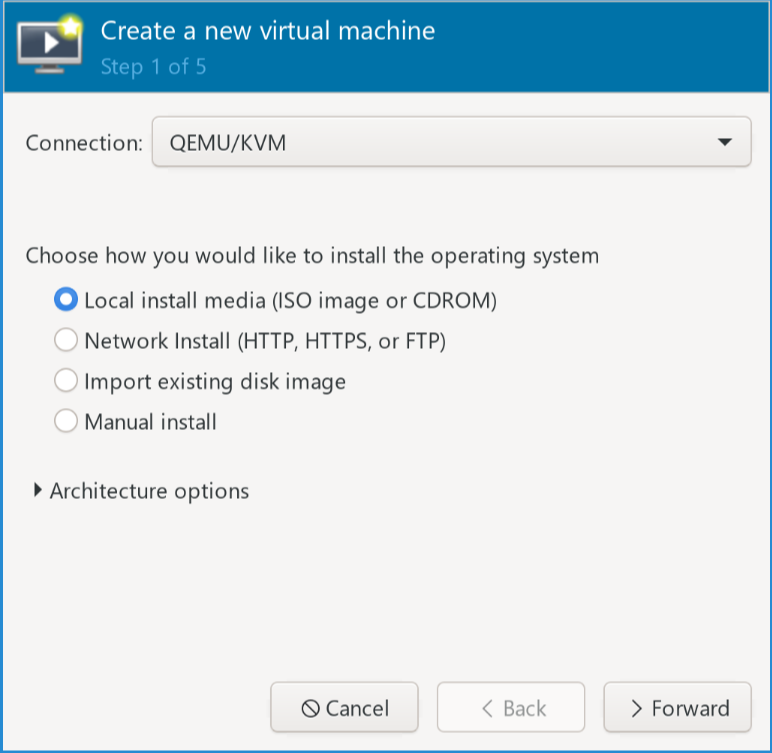
Then, continue and select the Windows ISO file (you likely want to use the
option in the “Locate ISO media volume” dialog).
It is okay if Windows 11 is detected as Windows 10 instead, as libvirt does
not have a Windows 11 option at the time of writing.
Once that’s done, you should decide how much RAM and CPU you want to give to the virtual machine. I would suggest at least 8 GB and 4 CPU cores if not more.
You’ll then be prompted to configure the storage. To start, it’s probably the easiest to use a disk image. We can change this later into some more optimal form, e.g. an LVM volume, a full block device, or using VFIO to pass through an NVMe SSD. This will be explored in a later part.
Then, in the last step of the wizard, you will be prompted to name the VM. At
this point, you likely want to configure the network to something sane. I
recommend that you start with the default NAT network, as that requires the
least amount of effort to get working. Depending on your distro, this NAT
network may not be running by default (you can check to see if it’s active in
virsh net-list). If it’s not, you need to run virsh net-start default to get
it running now, and virsh net-autostart default to get it running on startup.
You may also need to install dnsmasq before it would work. For optimal
performance, you can use bridge networking instead of NAT, but that is out of
the scope for this series.
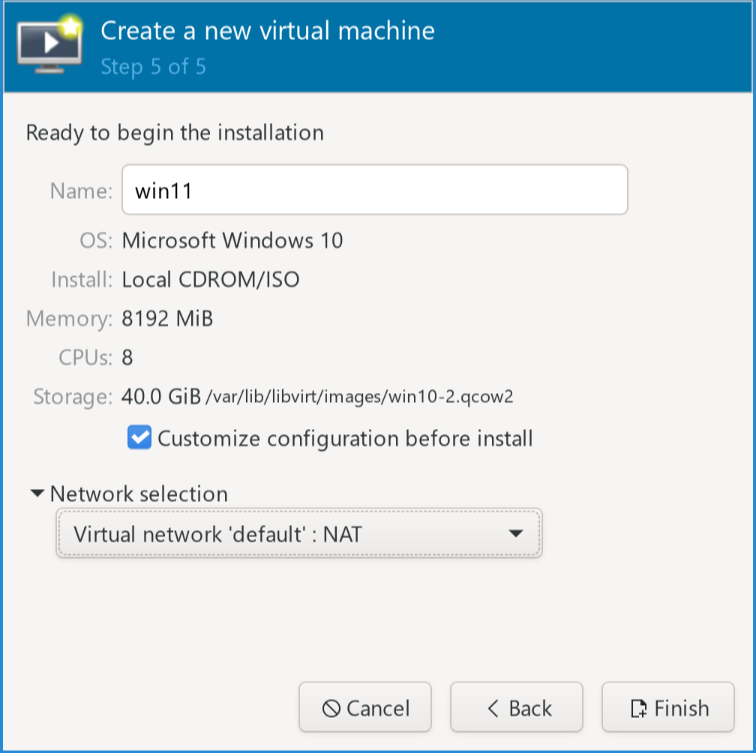
Then, remember to check the box before clicking , as we will be making some changes that would be very difficult to change later.
Here are the changes that need to be done before we begin the installation:
- In the “Overview” tab, change the firmware to . This is necessary to enable Secure
Boot to properly run Windows 11. On Windows 10, the plain
OVMF_CODE_4M.fdwould also work. Remember to your changes before you switch to a different tab. Note that some distributions do not come withOVMF_CODE_4M.ms.fd. Don’t panic! There is a way to bypass the TPM requirement.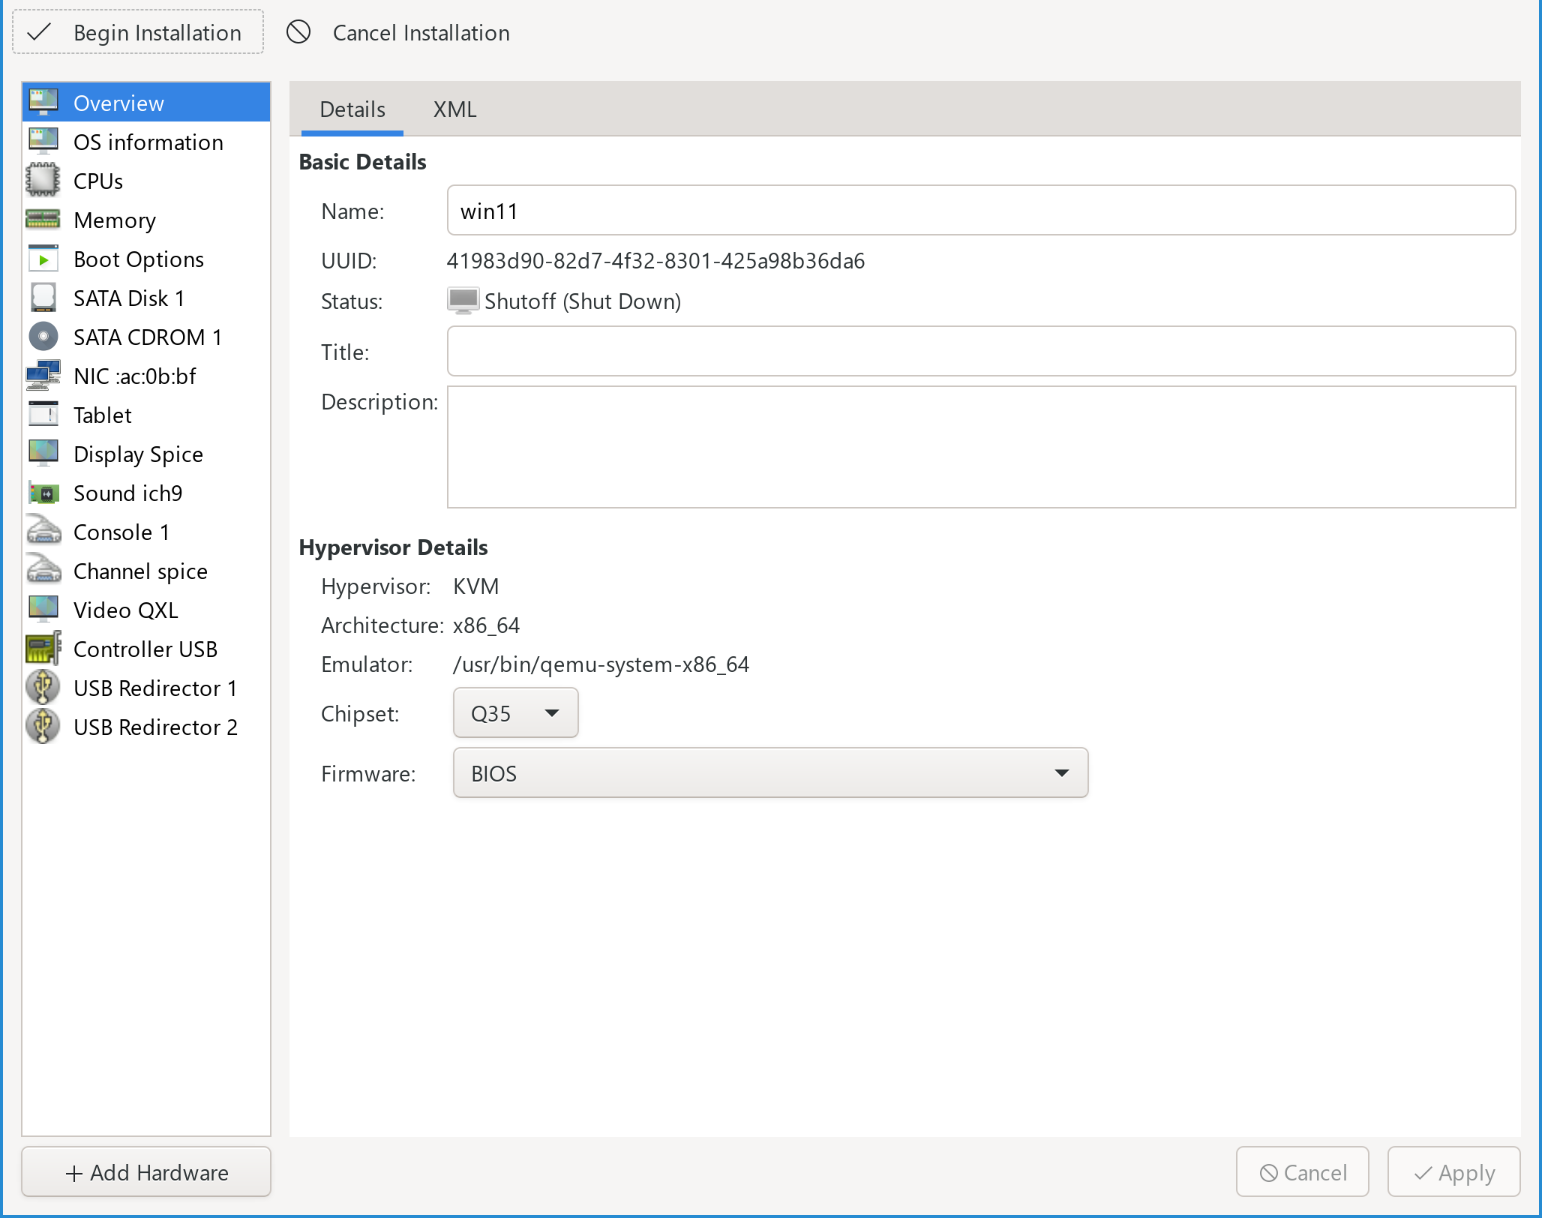
- In the “SATA Disk 1” tab, you want to change the disk bus to
virtiofor the best performance. - In the NIC tab, you want to change the device model to
virtio. - Click the button, select “Storage” and select
custom storage, then use then to select the
virtiodriver ISO. Remember to set the device type to CDROM and the bus type to SATA.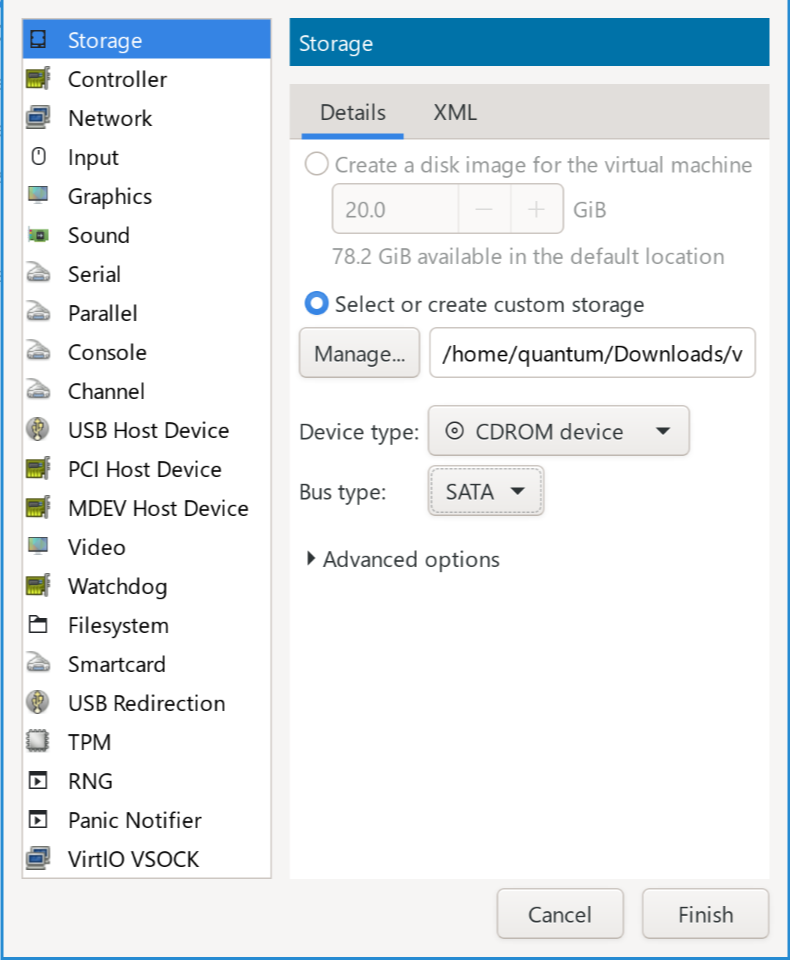
- Finally, if you are running Windows 11, you want to add a TPM. Press and select the TPM option, using the CRB model, the “emulated device” backend, and version 2.0.
You are now ready to continue! Press to start the process.
Installing Windows
The virtual machine should boot. Press any key when prompted, and eventually, you will land on the Windows installer welcome screen:
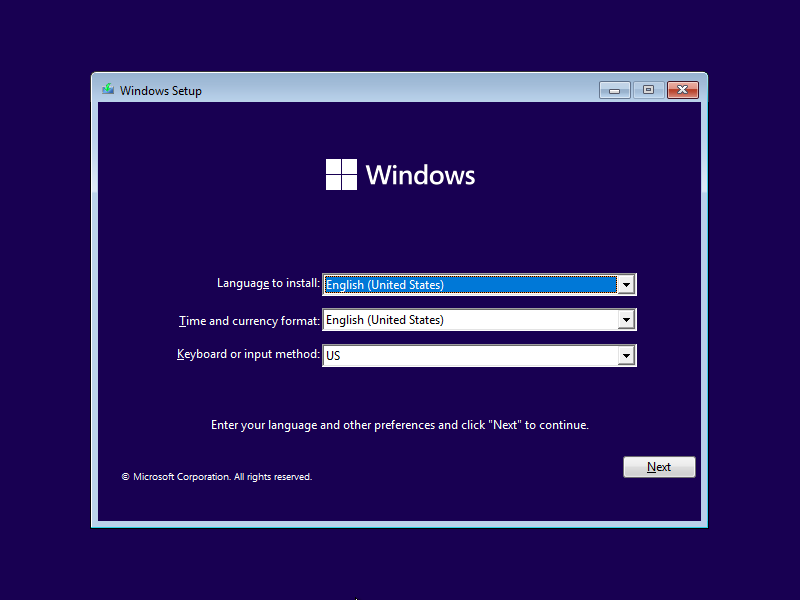
Select the language and then click the button. Enter your product key if you have one, otherwise, click I don’t have a product key. Select the edition you want to install, read and agree to the license agreement, then select the custom installation type.
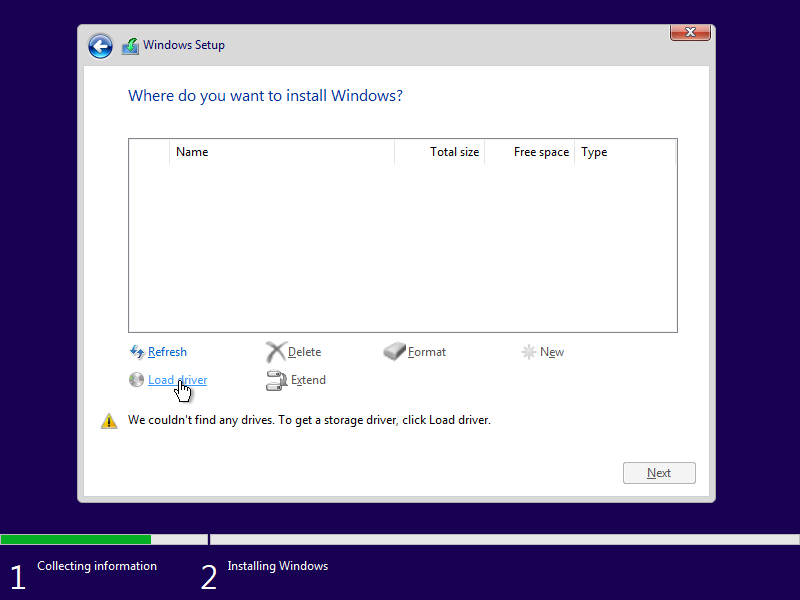
You will notice that you can’t see any drives. This is because Windows doesn’t
have the virtio driver. Click Load driver and browse to the amd64/w11 (or
w10) directory under the virtio-win disc. Select viostor.inf and continue.
You should now see an unallocated space. Select that to continue the
installation.
Wait a few minutes, and you’ll be prompted to select your country and keyboard layout:
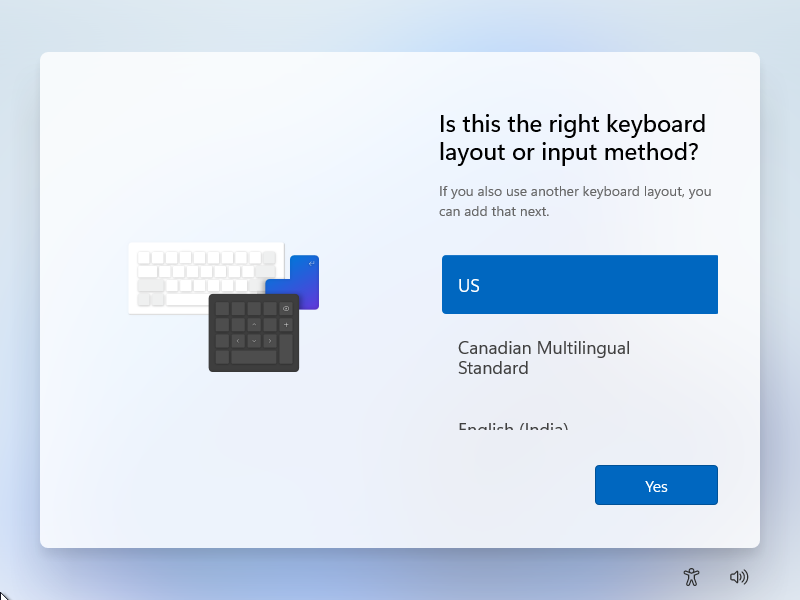
At this point, just follow on-screen instructions, except selecting and
when asked about networking. This is because we haven’t installed the virtio
network driver yet.
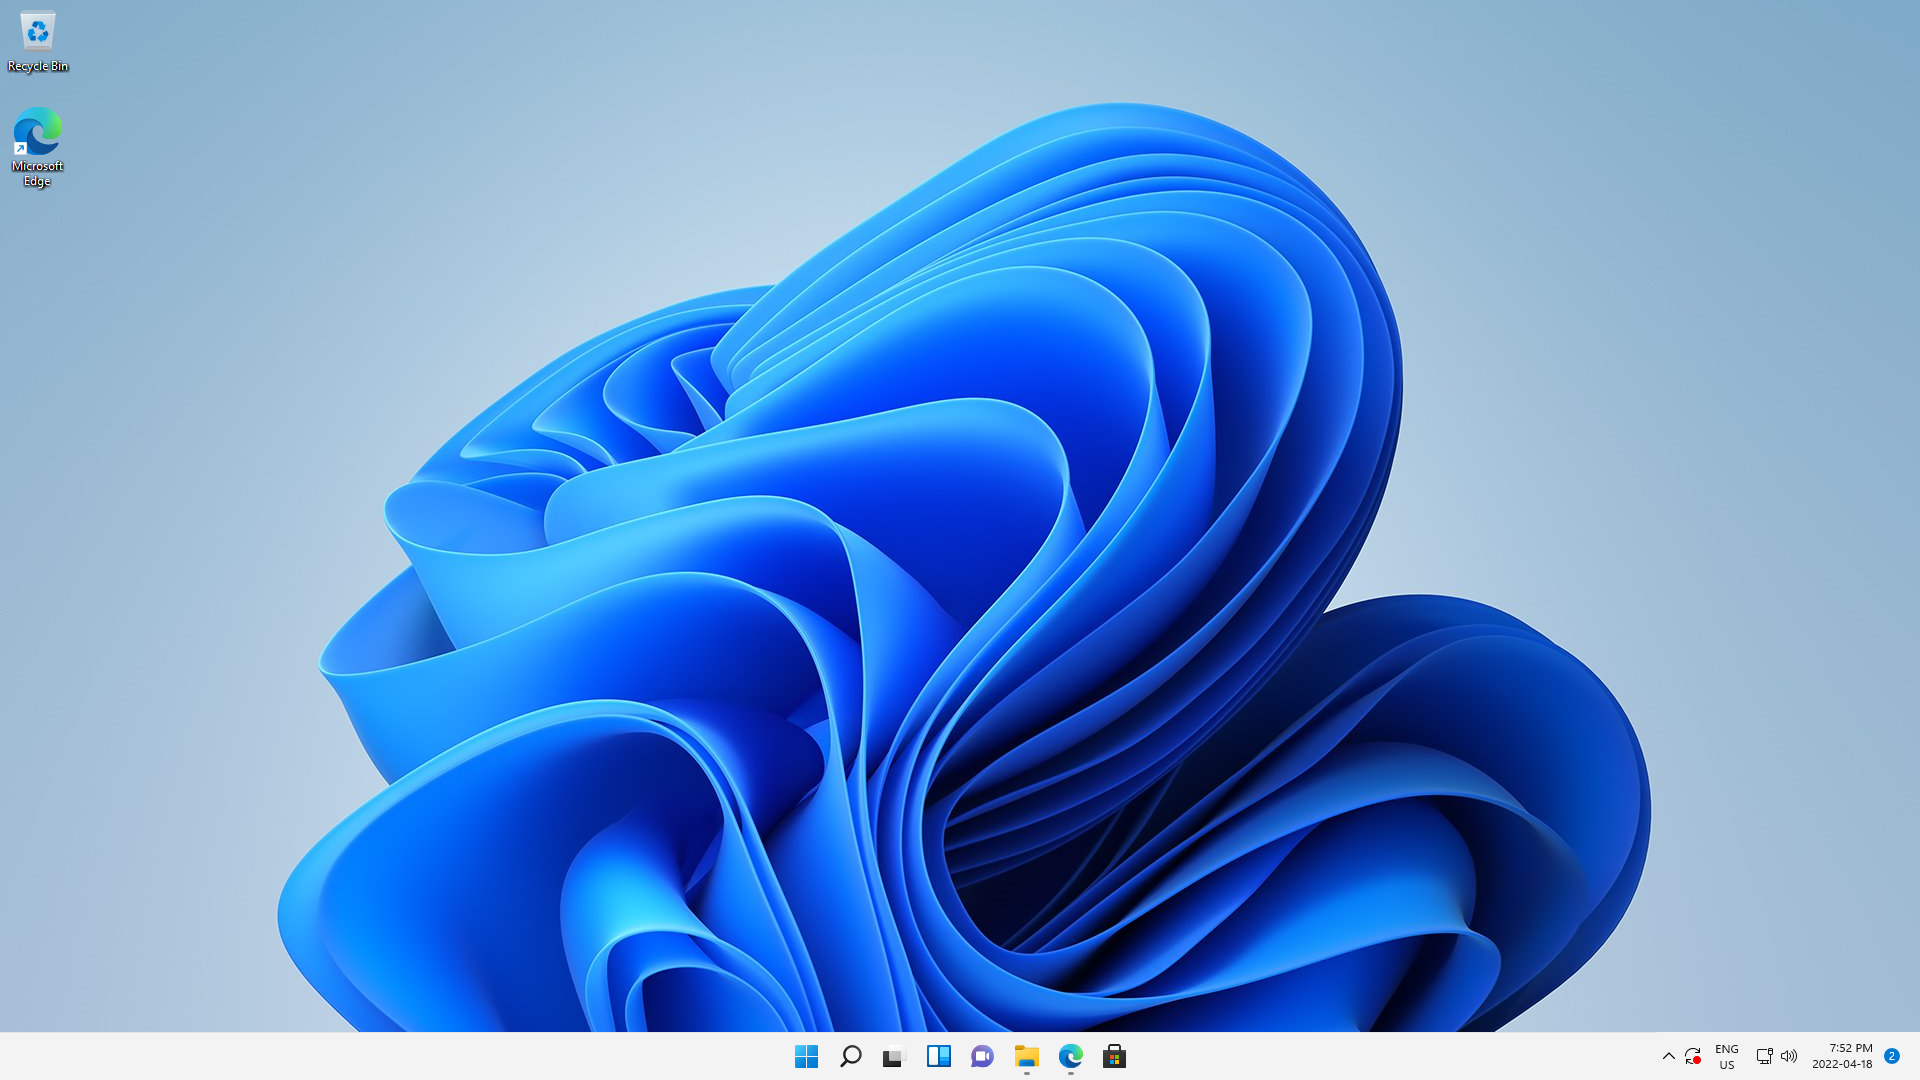
Once that’s done, you should end up on the Windows desktop.
No TPM / Secure Boot
If you don’t have secure boot enabled, you’ll see this screen when installing Windows 11:
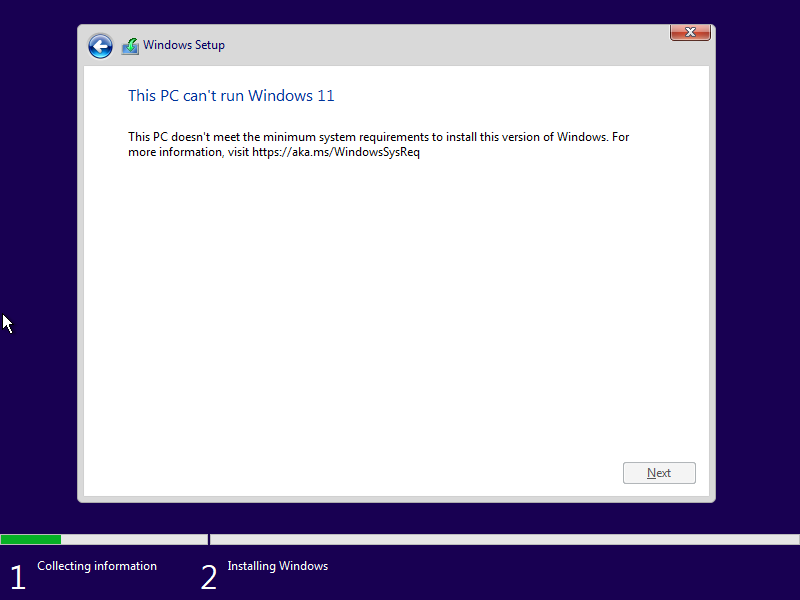
At this point, press Shift+F10, then run regedit.
Under HKEY_LOCAL_MACHINE\SYSTEM\Setup, create a new key called LabConfig.
Inside this new key, create the following DWORD values and set their values to
1: BypassTPMCheck, BypassRAMCheck, BypassSecureBootCheck.
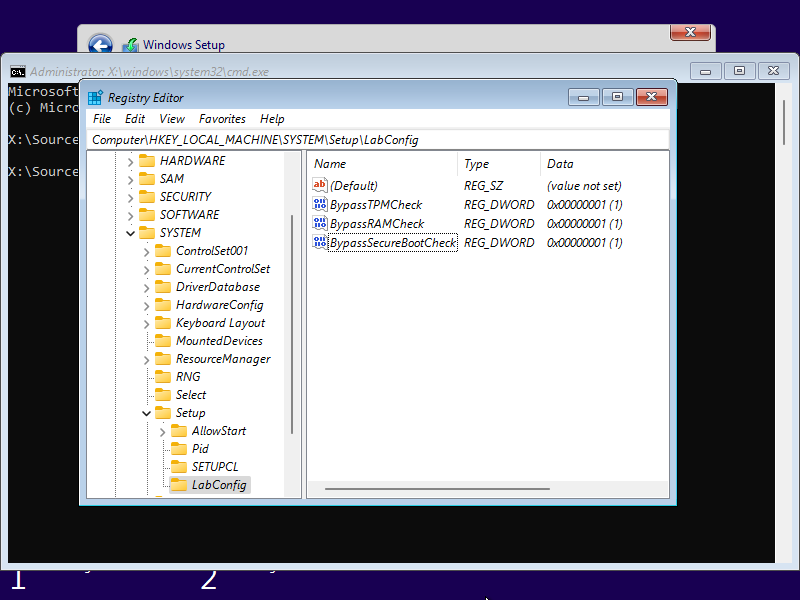
Now close regedit and the command prompt, go back one step, and click next.
You can now continue the installation as usual.
Installing Drivers
In the start menu, search for “Device Manager” and launch it. You should see a
bunch of “other devices” with no drivers. These are virtio devices.
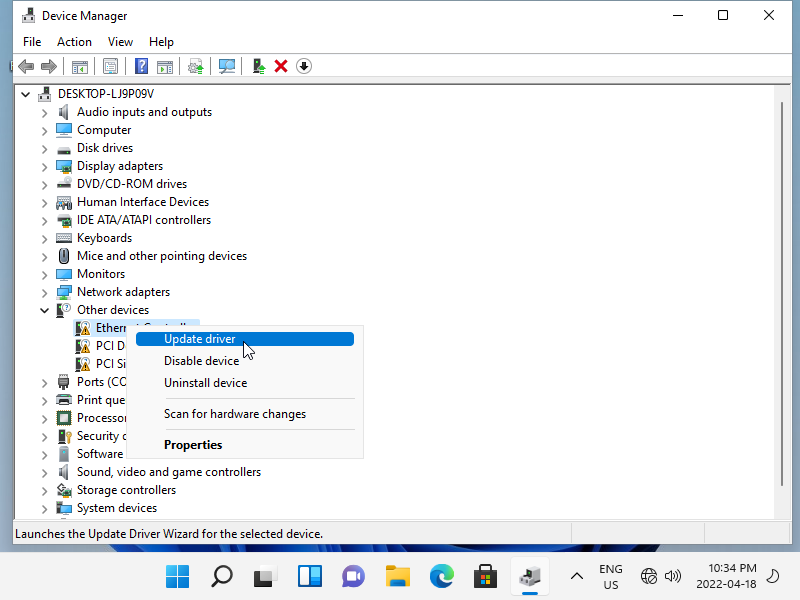
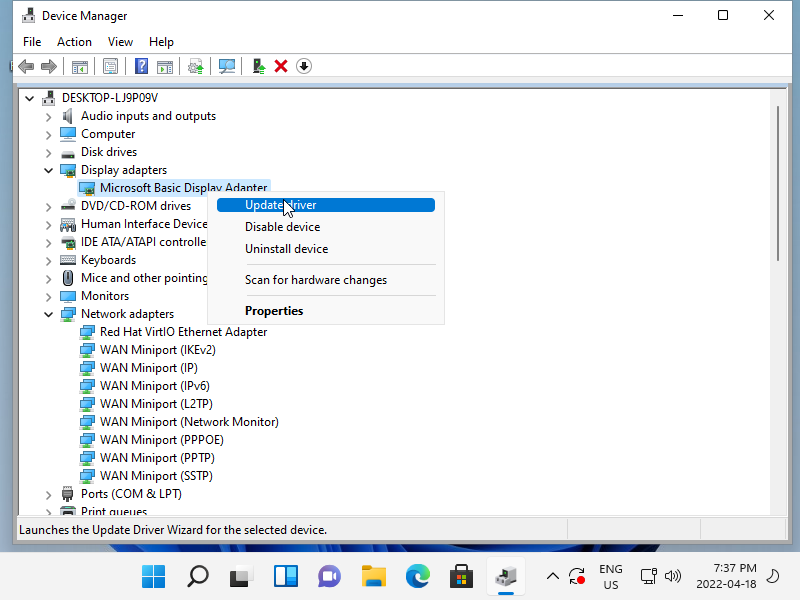
For all these, as well as “Microsoft Basic Display Adapter” under “display
adapters”, you want to update the drivers. To do this, right-click the device,
select “update driver”, and then browse your computer for drivers (in the
“Search for drivers in this location” section). Select the following directory
under the virtio-win drive (most likely E:) based on the device:
- For “Ethernet Controller”, select
NetKVM\w11\amd64(orNetKVM\w10\amd64on Windows 10). - For “PCI Device”, select
Balloon\w11\amd64(orBalloon\w10\amd64on Windows 10). Alternatively, you can ignore this device, since it is useless once we set up GPU passthrough and may harm performance. A future part will mention how to disable this device. - For “PCI Simple Communications Controller”, select
vioserial\w11\amd64(orvioserial\w10\amd64on Windows 10). - For “Microsoft Basic Display Adapter”, select
qxldod\w11\amdon Windows 11 if it exists (it doesn’t at the time of writing), otherwise selectqxldod\w10\amd.
Then press . Windows should find the drivers and install them. If prompted, reboot.
Once this is done, you should be able to change the screen resolution and enjoy a proper desktop experience.
At this point, your basic Windows virtual machine is complete. Next time, we shall discuss the process of passing a GPU through to the virtual machine.